Set Up Your Linksys RE7310 WiFi Extender
Easy setup, login, and troubleshooting guide to eliminate WiFi dead zones in your home.
Live Chat
Linksys RE7310 Extender Setup Process
Linksys range extenders can be used to configure your home network and increase its range to cover dead zones and access the internet conveniently. The Linksys RE7310 Extender Setup is among the most popular options available in the market today. If you have updated to one of these, learning about how to configure the internet settings and get things started will help in the device management in the long run.
This blog will walk you through the easy steps to access the Linksys RE7310 Wifi Range Extender Setup wizard and configure the device and network settings easily.
Linksys Extender ax1800 Setup- Things Needed
Before you configure the linksys extender setup, you will need to confirm that you have the internet service activated at your end. To check the same, try connecting your devices to the wifi router at your home and see if the internet works. Once confirmed, you can proceed with the setup process easily.
Secondly, you will need to access the default settings of your extender device. These settings include the admin username, password, and the default web address and the IP address. You can find the same on the product label pasted to the device. If not, check the user manual that comes along with the device for the same. For a quick reference, here are the default details you can follow:
- Username: admin
- Password: admin/ password
- Default web address: www.extender.linksys.com
- Default IP address: 192.168.1.1
Once you have these settings details available, you can proceed with the hardware setup.
How to setup Linksys RE7310 Extender?
You can set up your Linksys RE7310 extender using two main methods- the App based setup process, and the web based setup process. For the App-based method, you will need to download the Linksys App on your smartphone. You can download the same on your Android/iOS device easily from the App store or Play Store.
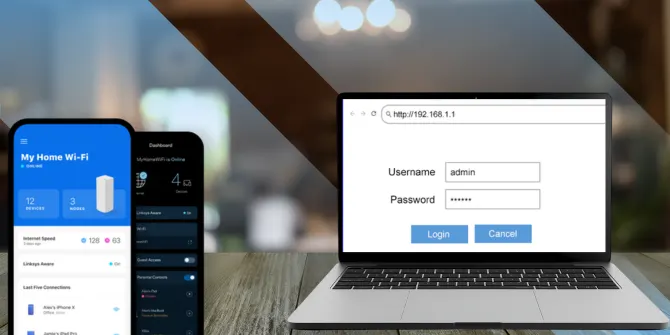
If you are going to use the web-based setup method, you can access the setup wizard online using the web address i.e. http://extender.linksys.com or the IP address i.e. 192.168.1.1.
The setup process starts with the login procedure which involves accessing the login page and then accessing the setup wizard online to configure the network settings.
Linksys RE7310 Extender Login Process
Learning how to login linksys RE7310 range extender is important as this is the critical step in the setup process. To start with the same, you will need to follow some simple steps like:
- Connect your range extender to the wall outlet at your home. Turn on the power supply and allow the extender to boot up.
- Connect your computer to the extender’s WiFi network using an ethernet cable or wirelessly.
- Once connected, open a web browser and in the URL bar, type in the default web address http://extender.linksys.com and press Enter.
- This will take you to the Linksys RE7310 extender login page. You will see the option to type in the username and password credentials. Type in the same in the dedicated fields you see on the screen and press Login.
- If you are logging in for the first time ever, you will need to create a Linksys account and only then you will be able to add your extender to the same. Click on the ‘create an account’ button on the screen to create an account and then proceed with the device setup process.
- Once logged in you can access the network settings online and configure them to your liking.
How to setup Linksys extender AX1800 RE7310?
Once you are logged in, you can configure the network settings easily. Below are the steps to follow:
- After the Linksys RE7310 extender login process is complete, the setup wizard will start looking for the main router networks to connect to. A list of the networks will be shown from where you can select your router’s network name and then type in the credentials to connect to it.
- The setup wizard will verify the credentials and then connect you to the router network. If you have a dual-band router, you will need to connect to the 5GHz network band as well.
- Once connected, you can configure your extender’s network details. These are the network SSID and password details of your extender network. Configure the same for both the network bands and then click on the Save button.
Tip: To distinguish the network bands, you can name them like Linksys2.4G and Linksys5G
- The next step is to configure the device settings. These are the default username and password used to gain access to the network set up wizard online. You can edit the same and then click on the Next button.
This step marks the end of the Linksys extender AX1800 setup process. Once you have edited these details, you can connect your devices to the wireless network of your extender and try accessing the internet. The final step will be to update the device firmware using the setup wizard, which is usually self-initiated. If so, allow the process to complete and then connect your devices.
Linksys AX1800 extender firmware update
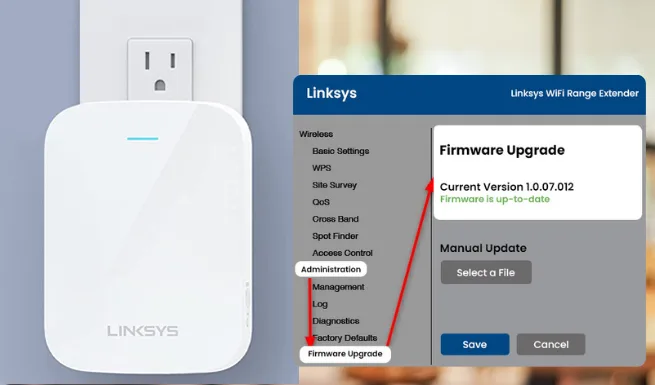
The firmware update process is generally automatic in the latest models from Linksys. Still, knowing how to firmware update Linksys AX1800 extender becomes important. However, if for some reason, you need to complete it manually, here are some steps you can follow:
- Download the latest Linksys extender firmware file from the official linksys website and extract the main file from the compressed folder.
- Login to the extender setup wizard and access the network settings online. Head to the extender administration settings and then upload the firmware file to the device.
- Allow some time for the process to complete. The device may restart a few times during the process. Do not turn off or restart the device until that is done.
- Once complete, you can access the network settings online and configure the settings for more personalization.
Need more help with Linksys RE7310 Extender Setup Process?
Get support from our expert team today!
Easy FAQ
Quick Answers